How To Make Beautiful Eco-Friendly Beeswax Candles
Not only are these homemade beeswax candles gorgeous, but they're also very simple to make at home. Learn how with this easy tutorial.

Making your own beeswax candles is a fun and easy way to add a touch of luxury to your home.
Not only your DIY candles are cheaper than store-bought ones, but you can customize them however you like.
They are also beautiful and have a wonderful natural scent.
Plus, they make great gifts!
In this guide, we'll teach you how to make beeswax candles at home using just a few simple ingredients.
So gather up your supplies and let's get started!
what you will need to make your beeswax candles
In order to make your own beeswax candles, you'll need some basic supplies including
- Good quality beeswax
- Coconut oil
- Double boiler OR a pan with water plus a heat-proof container to melt the wax in
- Cotton wicks
- Essential oils (optional)
- Containers for your candles - these could be tins, mason jars, etc.
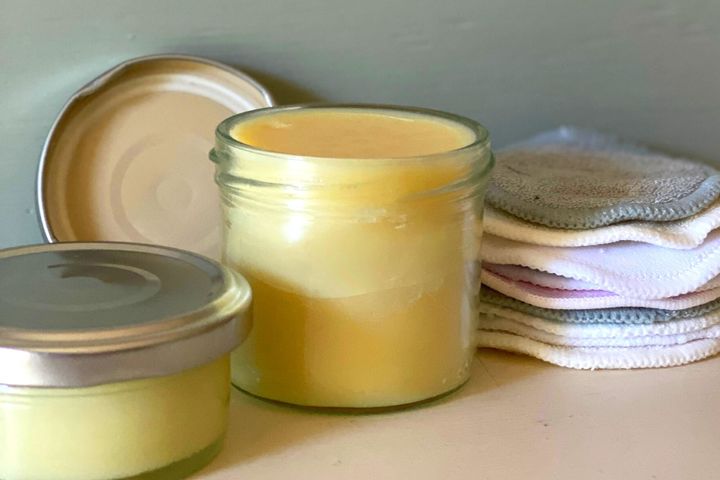
Beeswax
Candles made with beeswax burn clean and for a long time. They are 100% natural so they won't emit toxic substances as paraffin candles do.
It is important to pick a good quality beeswax like this one sustainably harvested in Texas

If your beeswax comes in pellets it will melt faster.
If you have blocks of beeswax (like the one above) you can either grate it or cut the block into smaller pieces for faster melting.
Coconut Oil
A little bit of coconut oil is added to the candle for better burning and to blend the essential oils in (if using).

Double boiler
A double boiler works great for melting your wax but you can also use just a pan with water and place a heatproof container (like a big measuring cup) in it.


Cotton wicks
Beeswax candles are slow burning so your cotton wicks should be quite thick like these pure cotton wicks pre-coated with beeswax.

Essential oils
To start with, beeswax candles smell lovely of honey on their own but if you wanted to add some essential oils in, you can!
Since beeswax doesn't keep the smell all that good, you would need a strong-smelling essential oil like peppermint essential oil, lemongrass essential oil, or lavender essential oil.
We wouldn't recommend using any expensive oil in a candle.


Containers for your candles
For your containers, you can reuse old mason jars, old candle jars, or tins. Make sure your container is not too wide. Usually, it's better if your jars are taller and narrower so that you don't have leftover wax around the sides of your candle.
For example, for a jar with a diameter under 4 cm use 1 wick, and for a candle with a diameter of 10 cm use 3 wicks to make sure all the wax is melting when you light your candle.

How to make beeswax candles
For this recipe you will need :
- beeswax - 1 pound (450 g)
- coconut oil - 1/2 a cup (100 g)
- essential oils of choice - 2 to 3 teaspoons
- cotton wicks
- containers for your candles
This recipe makes three 8oz candles or six 4oz candles.
The process of making your own beeswax candles is very simple.
- Melt the wax in a double boiler. This could take a long time so be patient
- Melt the coconut oil in a separate container.
- While the wax is melting, attach the wicks to the bottom of your containers. You can use the stickers that come with the wicks or just dip the base of the wick in beeswax and place it in the middle of the container.
- Secure the wick vertically by sticking it to a wooden stick put across your container.

5. When everything is melted mix the coconut oil and the beeswax well. Add essential oils (if using) to the coconut oil before combining it with the wax.
6. Pour the wax in slowly up to 3/4 of your mason jar or container. Leave to set in a warm place.

If your candles crack or develop holes in the middle, try pouring the mixture in three stages.
First half-fill your container and leave to set. Then reheat the mixture and fill another quarter and leave to set again. Finally, reheat the mixture again and pour the last quarter of the mixture. This way you should get a smooth and perfect candle.
7. Leave the candles to cure for 24 - 48 hours
8. Trim the wicks to 1/4 inch and enjoy!
Tips and tricks for making perfect beeswax candles every time
In order to make perfect beeswax candles every time, here are a few tips and tricks to keep in mind:
1. Make sure you use high-quality beeswax. The better the quality of the wax, the better your candles will turn out.
2. Use a double boiler or slow cooker to melt the wax. This will help ensure that it melts evenly and doesn’t get too hot.
3. Use only pure cotton wicks for your candles.
FAQs about beeswax candles
What is the difference between beeswax and paraffin wax?
Beeswax is, obviously a natural product, whereas parrafin wax is derived from petroleum. Parrafin wax can contain impurities, which, when burned, can emit toxic substances.
Beeswax candles also burn brighter and cleaner than paraffin wax candles.
Is soy wax a good alternative to beeswax?
Beeswax candles have been around for centuries and for good reason - they smell amazing, they're beautiful to look at, and they give off a warm, cozy glow.
But soy wax is a good alternative to beeswax for candlemaking. It is usually cheaper than beeswax.
What type of wick should I use for my candle?
The best wick for a beeswax candle is a cotton wick pre-waxed with beeswax or soy wax. Since a beeswax candle burns slower than a paraffin candle, the wick should be quite a bit thicker than that for a paraffin candle.
How long will my beeswax candle last?
How long will a beeswax candle burn will depend on many factors including the quality of the beeswax, the wick, the size of the jar or container you are using, etc.
But a good candle should give you many hours of lovely bright light.
Pure beeswax candles have the advantage of not going rancid over time. If the wick has burnt down, you can reuse the wax to make a new candle.
How to care for your beeswax candles
In order to get the most out of your beeswax candles, you need to take care of them properly. Here are some tips for how to care for your beeswax candles:
Keep away from drafts
Lit beeswax candles can be affected by air currents, so it’s important to keep them away from doors and windows if possible. This will help prevent the flame from flickering and sputtering out.

Trim the wick regularly
Trimming your candle's wick before each use will help your candle burn more cleanly and evenly. Make sure you trim it to about 1/4 inch every time.
Avoid burning near flammable objects
Never leave a lit beeswax candle unattended or too close to something that could catch fire easily, such as curtains or other fabrics.
Store in a cool, dry place
To keep your beeswax candles looking their best and burning properly, store them in a cool, dry place away from direct sunlight when not in use.
By following these tips, you can ensure that your beeswax candles will burn brightly and safely for many years to come!
Troubleshooting common problems
Unfortunately, issues may arise with your beeswax candles from time to time. Here are some of the most common problems and how to fix them:
Tunneling
This is when the candle burns down the center but doesn't melt out to the edges. To fix this, let the candle burn for at least 30 minutes each time you light it so that a full wax pool can form.
Flickering flame & smoking wick
If your candle's flame flickers or smokes, try trimming more of the wick and ensuring that there are no drafts in the area.
Wax not melting properly
If your wax isn't melting evenly or quickly enough, try increasing the size of your wick or moving your candle to a warmer place.
By addressing these problems as soon as they arise, you can keep your beeswax candles burning safely and beautifully for many years to come.
Enjoy your homemade beeswax candles!
Making your own beeswax candles is a great way to bring warmth and light into your home.
Not only are they beautiful, but they also emit a pleasant natural scent that can help create an inviting atmosphere.
With proper care and attention, you can enjoy these handmade beauties for many years to come!

Creative ways to use beeswax candles
There are many creative ways to use beeswax candles to add a touch of elegance and sophistication to your home. Here are some ideas:
1. Place a beeswax candle in the center of a large vase or hurricane lamp for a beautiful centerpiece.
2. Use beeswax candles as mood lighting in romantic settings or special occasions.
3. Melt down old beeswax candles and remold them into new shapes for unique decorations or gifts.
4. Make aromatherapy candles by adding essential oils to melted beeswax before pouring them into containers.
No matter how you choose to use them, beeswax candles are sure to bring beauty and warmth into any space!
Enjoy experimenting with creative ways to display yours! :)
This article contains affiliate links. We may receive a commission (at no cost to you) if you make a purchase through a brand link below. Learn more here.